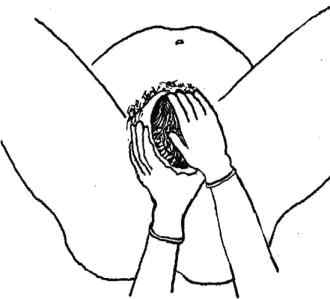
Once the head has crowned, the head is born by the extension of the face, which appears at the perineum. When the head is born, wipe the baby‘s nose and mouth with dry gauze; check the cord around the neck and take off your hand till the head turns to the side, then deliver the shoulder.
2) Check If the cord is around the baby’s neck
Once the head is born, check the cord around the baby‘s neck. If the cord is wrapped loosely around the neck, loosen it so it can slip over the baby‘s head or shoulders. If the cord is very tight, or if it is wrapped around the neck more than once, try to loosen it and slip it over the head.
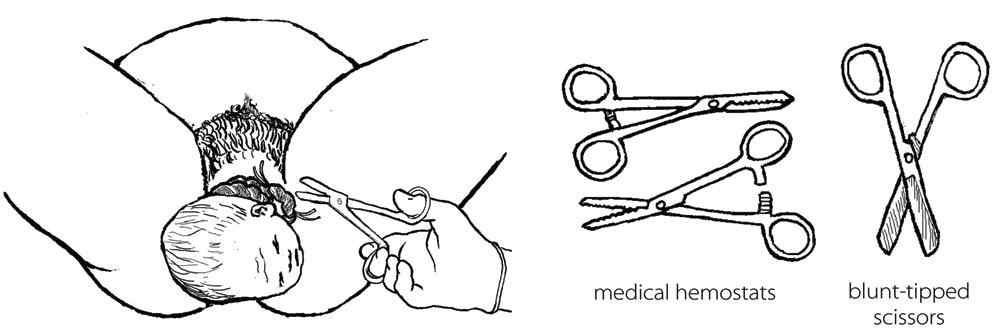
If you cannot loosen the cord, and if the cord is preventing the baby from coming out, In this situation use blunt-tipped scissors for cutting the cord and medical hemostats (clamps) for clamping. If you do not have this equipment, use clean string and a new razor. Tie in two places and cut it after the second tie (Figure 4.9).
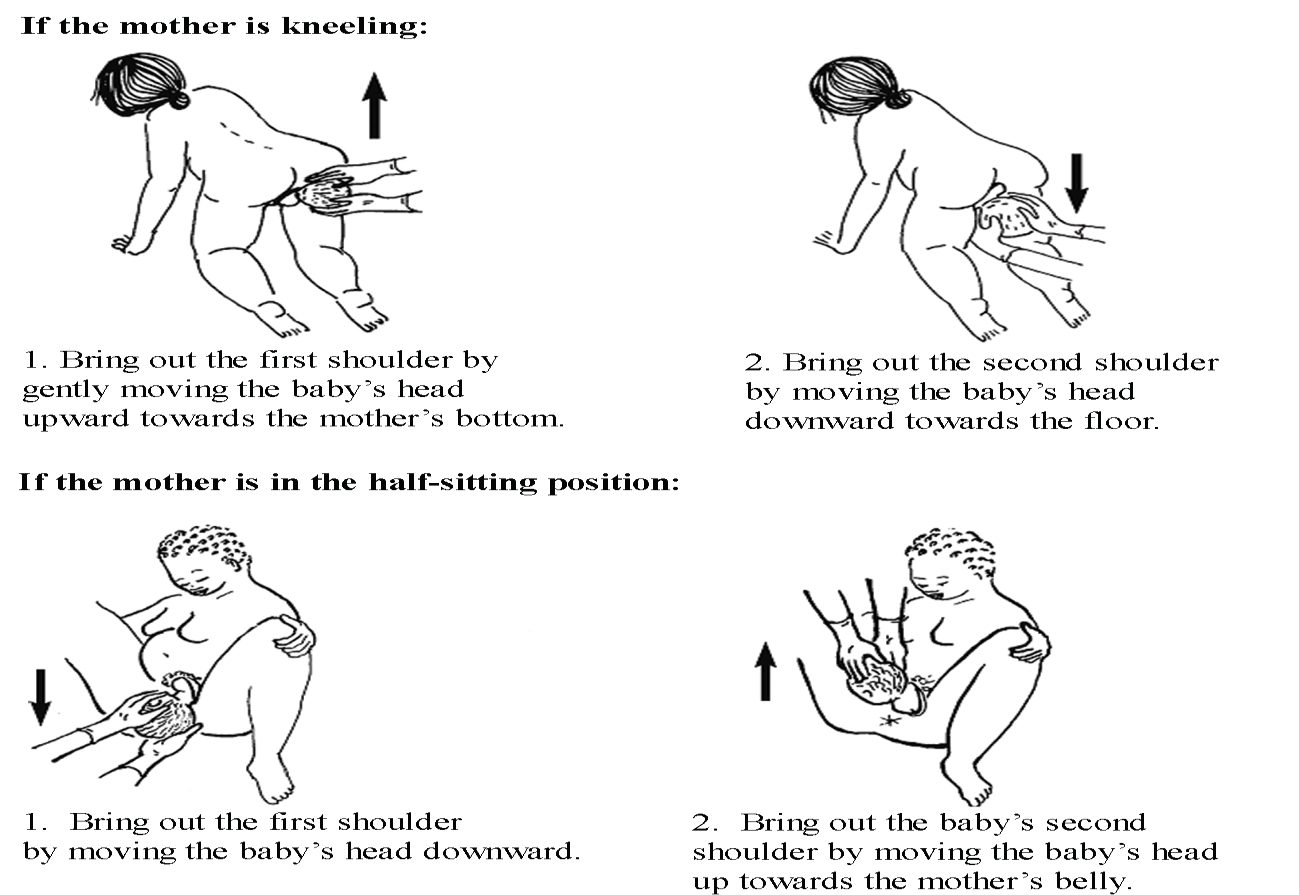
3) Delivery of the shoulders
After the baby‘s head is born and it turns the face to the side of the mother thigh, you should support the head by your both hands then apply downward traction to deliver anterior shoulder and upward traction to deliver the posterior shoulder to prevent tearing of vagina and perineum (Figure 4.10).
4) Delivery of the baby’s body
After the shoulders are born, the rest of the body usually slides out without any problem.Deliver and put the baby on the mother‘s abdomen, dry the baby and put on a new clean cloth and keep the baby warm. Be sure the top of the baby‘s head is covered with a hat or blanket. Make skin to skin contact and tell the mother to breastfeed the baby. This helps the baby to prevent heat loss and increase bonding between mother and the baby. Breastfeeding also helps the uterus to contract.
5) Cord care
After the delivery of the baby, cut the cord within two to three minutes but if the mother is HIV-infected or her HIV status is not known, it is better to cut the cord soon after you have dried the baby and made sure that the baby is warm. Don't milk the cord while you are cutting! (Figure 4.11, below).
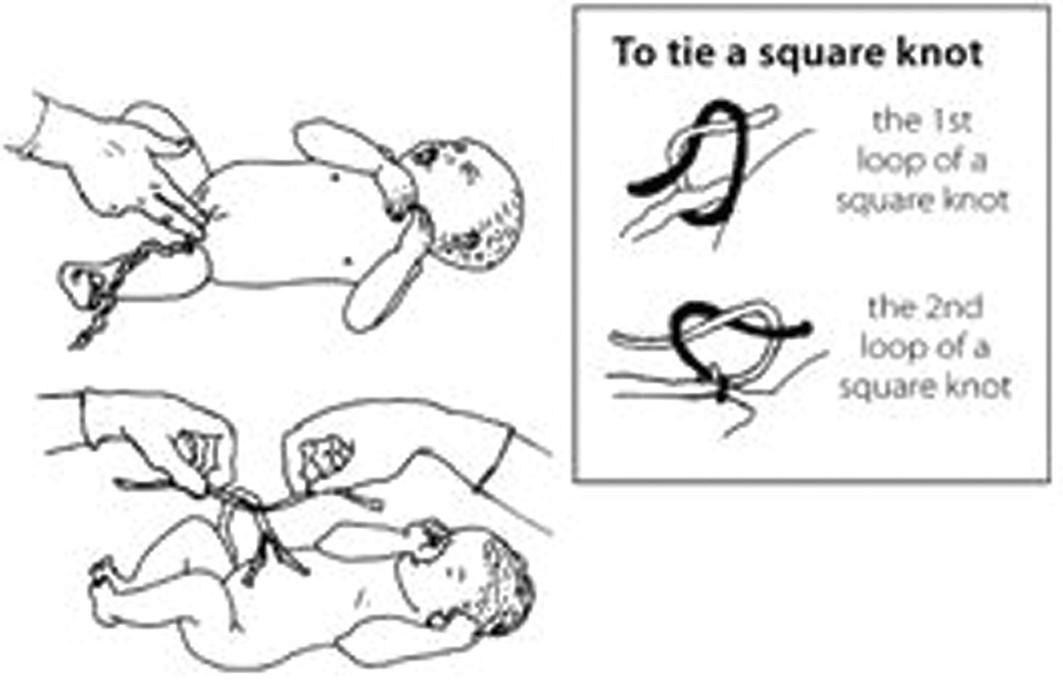
Use a sterile string to tightly tie the cord about two finger widths from the baby‘s belly and Put another sterile string one finger from the first knot then put a double knot on the cord to reduce the risk of bleeding. Cut after the second tie, that is approximately 5 cm away from the baby‘s belly.
Immediate newborn care is the care given to all the newborns soon after the delivery, irrespective of their condition to prevent complications. About 90% of newborn babies make the transition from intrauterine to extrauterine life without difficulty.
They require a little assistance to begin spontaneous and regular respirations. However, approximately 10% of newborns require some assistance to begin breathing at birth, and only about 1% needs extensive resuscitative measures to survive. You will learn about essential newborn care and resuscitation in Study Session 7. But some of the basic care are listed below:
Infection is dangerous and could kill both the mother and the baby. You should make sure that appropriate infection prevention practice or the basic rules of IP are followed during the whole process of labour and delivery. You can summarise these rules as the "three cleans": clean hands, clean surface (for the delivery) and clean equipment.
These rules further include hand washing with soap and water, wear protective barriers like cap, mask, eye protective wears such as goggles or face shields, putting on gowns, foot wears and gloves. IP also includes prevention of injuries from sharp instruments, safe handling of instruments, processing instruments (decontamination, cleaning and high-level disinfection using boiling). IP also recommends proper use of antiseptics and well management of any waste products generated during labour and delivery.
i) Hand washing: this is the easiest, cheapest but the most effective method to prevent the spread of infection. You should practice hand-washing on arrival at work, before and after contact with the mother baby, after handling contaminated objects (these are objects that come in contact with blood or any other body fluid) and specimens, before putting on and after the removal of gloves, after using the toilet and before leaving the workplace. You could follow the following hand washing procedure as indicated below:
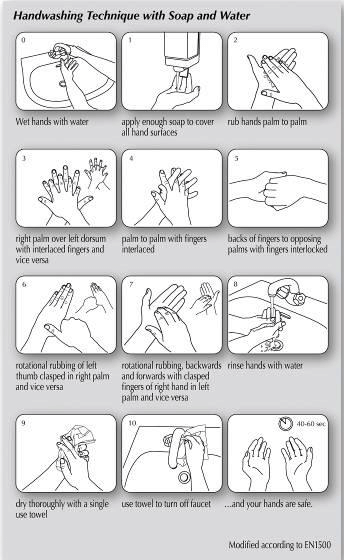
![]()
Remember! While you wash your hands, you should also include washing your arms with soap and clean water all the way up to your elbows
ii) Hand hygiene using alcohol and glycerin
Hand hygiene can also be done by a simpler but a more effective hand hygiene method using a hand cleanser solution. The solution can be made from alcohol and glycerin. You can use this method as a supplement to hand washing technique if there is no enough water to wash your hands with.
You can make this cleanser solution by mixing two mL of glycerin with 100 mL of alcohol ( 60- 90%). To clean your hand, apply 5 ml (1 teaspoon) of the solution on your hands thoroughly and keep rubbing until your hands are dry. You can use a similar technique of hand washing which is clearly stated in figure 4.12 (the difference has you used alcohol and glycerin solution instead of soap and water).
iii) Gloves
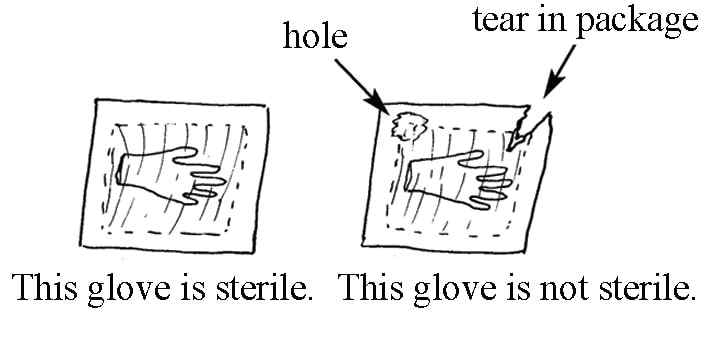
Gloves are a physical barrier that prevents cross contamination (transmission of infection from the mother to you and vice versa). There are three types of gloves: sterile/surgical glove, clean glove and utility/heavy duty glove.
You should use sterile gloves when you have to do a vaginal examination and assist the mother during labour.
![]()
Remember! You must always use a sterile glove for sterile procedures like vaginal examination and assist delivery.
The following box shows how to wear and remove sterile or surgical gloves:
How to wear sterile gloves
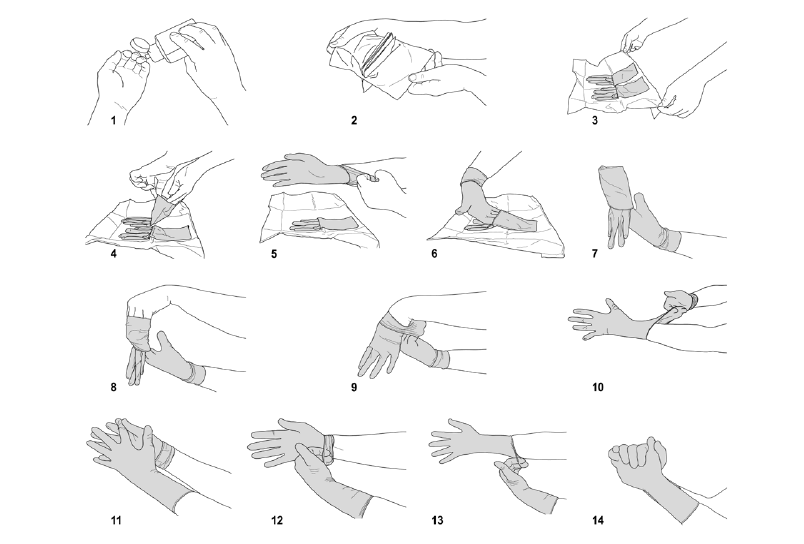
Figure 4.14. How to Remove used gloves
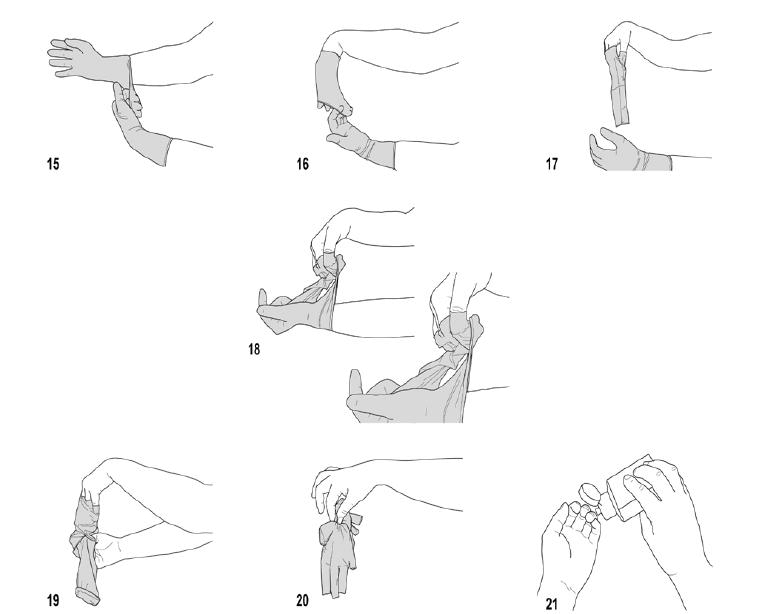
Figure 4.15. Clean gloves should be worn when you have a high chance of coming in contact with blood and body fluids or any contaminated/infected areas or body surface.
Utility gloves should be worn when you clean and further rinse the delivery instruments you have already used.
Masks
You should wear a mask to protect any blood or body fluid splash from getting to your mouth. It also protects any microorganisms expelled from you.
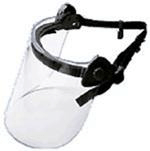
Eye protective wears (goggles and faces shields)
Goggles protect your eye from any blood or body fluid splash getting into your eye. Face shield also protects the whole face from any contaminated splash of fluids (Figure 4.16).

Gown
Clean gowns are the kind of physical barrier that protects any cross contamination. Especially gowns made from plastic apron provide more protection since they do get wet and let microorganisms pass through.
Instrument processing is a process of making instrument free of microorganisms. It includes decontamination --> cleaning --> boiling instruments before reusing.
i) Decontamination:
Decontamination is the process of removing microorganisms from the surfaces of an instrument. Decontamination means making contaminated instruments free from a microorganism by putting them in a 0.5 % chlorine solution for 10 minutes.
Make sure all the surface of the instrument is immersed under the 0.5 % chlorine solution. A 0.5 % chlorine solution can be made by mixing 5 jugs of chlorine" braking" with 9 jugs of water.
Before disposing of sharps like syringes and contaminated materials like gloves, you should immerse them in a 0.5 % chlorine solution.
ii) Cleaning:
iii) Further high-level disinfection using boiling:
iv) Healthcare waste management: