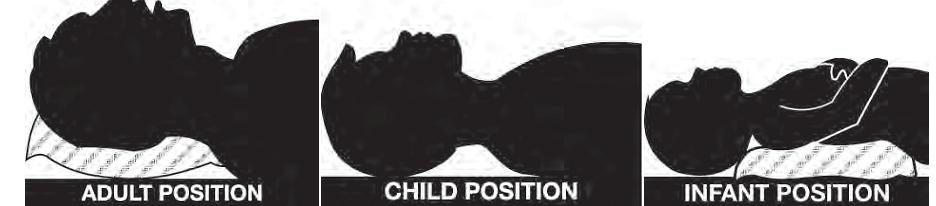
Figure 6.9 Positioning for intubation for different age groups
When assembling equipment for intubation, has the list of equipment as explained in the table 5.1 of equipment required during laryngoscope and intubation.
Positioning the patient is important to the success and ease of intubation (Figure 6.9). The neck should be slightly flexed and head extended (sniffing position) to allow for the best view of the larynx. In adults, one or two pillows or blankets should achieve this. In children, no pillow is needed. In infants it may be necessary to place a small pillow under the shoulders.
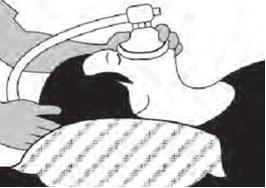
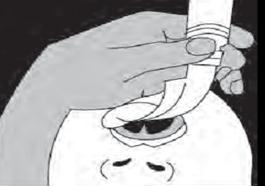
6.3.2.1The first step in an anesthetic induction is to pre-oxygenate the patient with 100% oxygen (Figure 6.10). This will remove nitrogen from the lungs. Remember that the air we breathe contains only 21% oxygen. The induction of general anesthesia will abolish or diminish the patient's ability to spontaneously breathe. If difficulties are encountered with the establishment of a patent airway, then the patient has an enlarged reservoir of oxygen, increasing the margin of safety.Pre-oxygenation is accomplished with a mask held tightly against the patient's face. Pre-oxygenate the patient for 3-5 minutes. Alternatively, ask the patient to take 8-10 deep, vital capacity breaths. This should be completed prior to the anesthetic induction. Once general anesthesia is induced, mask ventilates the patient unless you are performing a rapid sequence induction.
Do not use excessive pressure when ventilating the patient with mask. Do not exceed 20 cmH2O otherwise you will introduce air into the stomach.
Mask ventilation may be difficult in patients with a full beard, patients without teeth, obese patients, and patients that have a decreased mobility of the neck. Be prepared! Have an alternate airway plan available to maintain a patent airway.
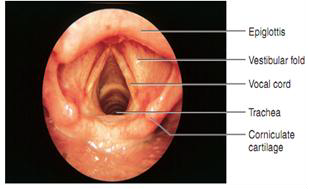
At this point the blade should be in the middle of the mouth. Gently advance the blade until the epiglottis comes into view (Figure 6.13). If we are using a curved blade the tip of the curved blade will go into the vallecula. When using a straight blade the anesthesia provider will pick up the epiglottis (Figure 6.14).
At this point check to make sure that the patient's lips and tongue are not caught between the laryngoscope blade and the teeth. Gently lift the laryngoscope upwards toward the ceiling.
Take care not to rock the laryngoscope back and forth. Make sure pressure is not applied to the patient's teeth. This will result in dental trauma.
If you are having trouble seeing the patient's anatomy, have an assistant retract the patient's right upper lip (Table 6.3). This may improve your view. At this point your assistant should hand you the endotracheal tube. Place the endotracheal tube through the vocal cords to midtrachea.
Immediately after intubation, the cuff is inflated, and the anesthetist should observe the sequential rise and fall of the chest while auscultating over each midaxillary line and the epigastrium to assure that the trachea, not the esophagus or bronchi, has been intubated.
6.3.2.3 Causes of difficult visualization during laryngoscopy
There are objective and subjective means of confirming ETT location. For every intubation, at least two objective criteria of ETT location should be met.
6.3.3.1 Objective methods of confirming endotracheal tube location
6.3.3.1.1Observing the ETT goes through the cords: If the ETT is visualized going between the cords, it must be in the correct place. A few additional comments on this otherwise simplistic statement are in order:
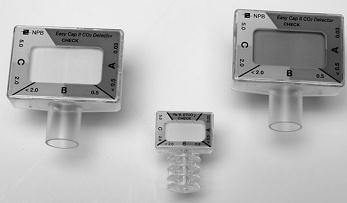
6.3.1.1.2 End-Tidal Carbon Dioxide (ETCO2):
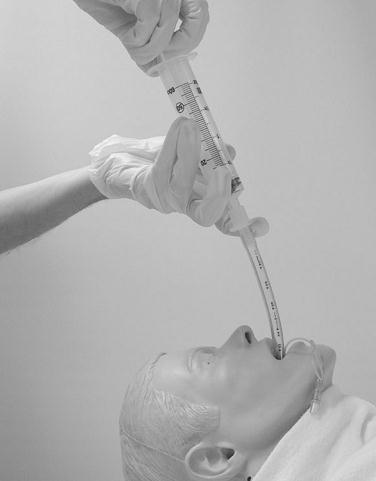
A 60 cc catheter-tipped (Toomey) syringe can be used (Figure 6.16). Normally used for aspirating or irrigating foley catheters or nasogastric tubes, the tip of such a syringe can be forced into the end of the ETT connector after intubation. The syringe plunger is aspirated and released. If the plunger stays out, there is no negative pressure, implying it has aspirated air out of the tracheal air-space and the tube is correctly sited. If the plunger slides back to near its original position, the ETT is in the esophagus.
| Figure 6.16 EDD with 60 cc syringe | Figure 6.17 EDD with rubber bulb |
|---|---|
 |
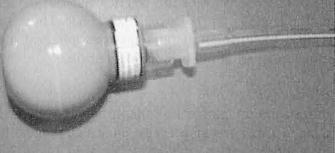 |
A second type of EDD uses a rubber bulb (Figure 6.17) proximally on a syringe, which returns to inflated conformation spontaneously after being squeezed. The bulb is squeezed and the device attached to the ETT. If it refills quickly (with air from the tracheal airspace), the ETT is in the trachea. If it stays depressed or refills slowly, the ETT is in the esophagus.
6.3.3.2 Subjective (clinical) signs of tracheal intubation
Following confirmation of appropriate endotracheal tube (ETT) positioning, the tube must be secured to the patient. Fixing tube will help to prevent accidental dislodgement or advance of the tube. This can be done by taping the endotracheal tube at the patient's lips (face) corresponding to the 21- to 23-cm (adult) markings on the tracheal tube usually places the distal end of the endotracheal tube in the midtrachea. Perspiration, blood, vomitus, and other body liquids may interfere with tape adherence. Water proof tape is preferred to ensure tape adherence. An oropharyngeal airway or roll of gauze sponges placed between the teeth keeps the patient from biting ETT.